Thursday, February 26, 2009

Baking Therapy


I found a hidden gem during my excursion to Telluride - a fabulous little pizza shop/bakery called BIT - Baked In Telluride. It was delicious - on a 6 day trip, we were literally there 3 times. They had great cookies, but the best were clearly the oatmeal butterscotch and the oatmeal chocolate cookies with chocolate drizzle. The hermits, peanut butter chocolate cookies, the sugar cookies, and M&M cookies were all delicious (and of course, I sampled them all), but the oatmeal cookies were the real standouts!

I returned home on Saturday and realized my Mom had a day of baking planned on Sunday. How could I resist? Even though I brought over all of my baking supplies to her house to keep me from baking, I still had to take part in this day of baking therapy. Our agenda was ambitious to say the least. Her plan was frosted cinnamon chip cookies (my absolute favorite) and espresso chip meringue cookies. I was committed to baking ice cream kolaches and chocolate covered cherries (more on these later). In our shopping, we dropped into Michael's Craft Store and were lured into a baking aisle, where I also bought some tools for candy making. Oh the excitement.

Allow me to back-track. The flight from Dallas to Boston on Friday night yielded a copy of the most recent Taste of Home cooking magazine. Ironically, this was the Winter Baking Edition! Tremendous! There was a section dedicated to quick breads, one dedicated to pastry, and a section dedicated to chocolate. All the pictures were mouth-watering, and when I met up with Mom, we decided that we had to try our hand at making chocolate covered cherries and ice cream kolaches. Kolaches, as it turns out, are a Polish cookie filled with nuts, seeds, or jams. They are similar to rugelach, but different in shape and the lack of cinnamon, sugar, and egg wash. The variation in Taste of Home magazine required the cookie dough to be made with vanilla ice cream instead of the standard wet ingredients. I combined the butter and ice cream, along with flour, sugar, and a little bit of salt, and divided the dough into quarters. The dough sat to chill for the next several hours.

Meanwhile, Mom was beginning to make a mean batch of cinnamon chip cookies. These cookies are literally the first I have ever encountered that I actually liked the taste of the baked cookie better than the batter itself. I think it has something to do with the fluffy white frosting that adorns the top. Here are the steps to these yummy cookies. First and foremost, secretly acquire from a REAL bakery tried and true cinnamon chips (not the waxy stuff they sell to recreational bakers). See image at right!

Next, you need to cream together the butter and sugar. This, traditionally, is my favorite part, save for the time that I had to do it for an upside-down cake!

Mom made the rest of the batter for the cookies, adding flour and a bounty of her delicious cinnamon chips. Next, we were on to meringues. Now, Mom has made pavlovas before, but this was my first venture into seeing how meringues are done. Boy, it is tough to tell whether you have achieved stiff peaks or not. Is everything supposed to be in stiff peaks, or are some stiff peaks good enough? Who knows? And then I freaked out in this process too when you had to start adding in the espresso powder and the chocolate chips. I have always heard that egg whites are so delicate that you do not want to break down their proteins when combining them with other ingredients, but I was at a loss for what that meant. Here is Mom expertly separating the whites out from the yolks, an essential part to good meringues.

I decided to be creative and use our pastry tips to pipe out the meringues onto the parchment-lined cookie sheets. That was great until the phone rang, I got distracted, the pressure in the bag increased, and I blew the piping tip right off the psuedo-pastry bag. Having then been consumed by the phone call Mom and I BOTH forgot to remove the tip from the cookie. Good thing I decided to eat the ugliest cookie three days later because I hence found the missing metal pastry tip that we hadn't realized had gone missing. Oops! The meringues, all told, came out quite tasty, and are somewhat healthful, considering they lack fatty egg yolks.

Feeling quite excited about my foray into candy (much like my sister) I began to work on my chocolate covered cherries. These are not terribly homemade, as the ingredients are drained maraschino cherries, butter, confectioners sugar, sweetened condensed milk, and chocolate melting candy, but I still felt quite accomplished. The first step was to craft the white candy to surround the cherry. This is where the butter, sugar and milk came it. It made a fun candy dough with a texture similar to marzipan (but none of the inconvenient almond flavor). This was wrapped around the cherries, and the cherries were then dipped in chocolate. Easy enough! And after my visit to Michael's I had acquired the tools to decorate the little candies. What fun!

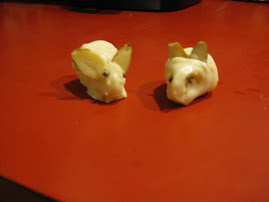
Now, I don't know anything about crystalization, tempering chocolate, or the blooming effect that Kerri talked about in her blog. I just goofed off and had some fun with decorating these cherries. I then started to play around with a kitty cat candy mold I purchased on a whim at Michaels. I made some mice, a food bowl, a fish, and a couple kitties. This was simple and nearly brainless. A perfect way to spend a snowy Sunday.

Baketress Retirement


Biscuit was unhappy as he realized that all the baked goods I were making were causing his weight to steadily increase. I declared that I would go into baketress retirement after I tried one final recipe - Cheesecake Thumbprints.

The cookies themselves seemed like nothing more than shortbread, but what made them wonderful was the cream cheese and sugar mixture that filled them and allowed them to be topped in a number of new and exciting ways. Biscuit was off at tennis, and I was busy filling the kitchen with cream cheese love! Above you can see the little cookies, complete with my thumb prints. These needed to be twice-baked to ensure that the cavities created by my thumb were deep enough to hold the sweet, sticky contents. The cookies needed to be cooled before they were filled, and then baked again, considering that the cream cheese mixture also included some egg in there. A cookie that needs to be baked three times! Oh my! We should refer to these cookies as triscotti from now on!

Anyways, the fun part about them, short of eating them, was decorating them. I used everything around the house. Once the cream cheese goodness ran out, I started filling the cavities with everything from raspberry jam to leftover whippy ganache. The best ones were clearly the cookies with the cream cheese filling topped with little fruits. Here is the delicious little array - I used blueberries, raspberries, and even the cherries my Grandma uses on her infamous Cherry Tarts. All of them were scrumptious.

But, alas, I had to announce my temporary retirement from baking. Biscuit and I recommited ourselves to fighting the fat, save for the trip to Telluride we planned on taking. We were committed to getting back on track. Or were we?

Ganache Panache!


Ah, chocolate ganache. Smooth, rich, delicious, and in this cake recipe, the ganache came in two forms. I decided to bake a chocolate mint devil's food cake for a dear friend's birthday. This was only the second homemade cake from scratch I have ever attempted. The cake batter was easy - and I learned that devil's food really just means that cocoa and sour cream are added to cake flour and standard wet cake ingredients. The "devilish" part comes from how good it tastes - people used to believe that this chocolate cake was so good, it could have only come from el diablo himself.

The cake baked beautifully, but cooling is the part I hate. It was a night where the temperature was in the teens, yet I still had the windows open and the fan going so I could cool my cake to start the frosting process. Meanwhile, I also began to combine my heavy cream and 2 POUNDS of chocolate to create the ganache. I added pure peppermint extract for that nice, minty flavor.

Above was the silky ganache that was produced after toiling over the stovetop until everything melted together. On the left here is the product that was produced after whipping the ganache in my Kitchen Aid for nearly ten minutes (stiff peaks stage). This layer was meant to be in between the two cakes, then frosted on top, before the final layer of the liquid ganache was poured.


For the most part, the cake and ganache got along. However, because of my hastiness in the cooling process, I neglected to realize that the cake may be cool to the touch, but certainly not through and through. When I went to cut the cake with a serrated blade to even the two layers out, I had some hot, angry innards to deal with. Once I began to assemble the cake, the internal temperature of the cake caused a great deal of the ganache to melt, putting me on damage control. I frosted the top layer with whippy ganache, then poured over the liquid ganache. This worked surprisingly well.

While Martha Stewart recommended finishing off the cake with chocolate-covered mint leaves, I decided to use crushed candy cane bits. The mint was looking a bit limp at the supermarket, and figuring that this was for a fourteen-year old, that the candy cane pieces would be a fun touch. This was the finished product. I now understand why Martha recommends using cardboard rounds because Biscuit and I had a heck of a time trying to transport the cake from the cooking rack to the box. The thing nearly split, putting me once again on damage control, using extra ganache to repair a few cracks here and there. Luckily this recipe yielded enough ganache to cover an acre of land, so there was plenty to salvage the cake.

I stored the whippy ganache, thinking I could do something creative with it later on. I did try to use it in the thumbprint cookies I did next, but it was clear that thumbprint cookies are really meant to have cream cheese filling. I did manage to recycle the cake scraps from the leveling incident, add to them the remaining ganache and make Biscuit a little mini-cake of his own. It was certainly not pretty to look at, but we got to sample what the cake would taste like. To me that is the tragedy of cakes - when you bake them and give them to someone, you never fully know how they turn out (unless you stalk them and make them share). At least I was able to take elements of the cake, put them together, and have Biscuit act at my guinea pig. He said he loved the chocolate peppermint flavor and he even liked the texture of the ganache. A big surprise - considering his texture issues.

The only sad part about this story is that I came to find out, only after the fact, that indeed, the cake recipient did not like chocolate. I hope, at least, her family or someone enjoyed the efforts.

Thursday, February 12, 2009

Sweet, sweet victory!


In my last blog, I neglected to mention how the weekend of extravagance began! Biscuit decided to surprise me with an early Valentine's dinner to our favorite restaurant, La Campania in Waltham. We dined on roasted oysters, diver scallops over parsnip puree with cranberry-port reduction, veal saltimbocca, prosciutto di parma stuffed chicken, and two exquisite desserts - chocolate torta and pear crostata! Oh my goodness, was it delicious. The attention to detail, right down to the basil-infused olive oil and the warm, crisp bread, was exquisite.

And then, to my surprise, Biscuit presented me with a gift - a new digital camera! This, in fact, was the catalyst for the rash of baking I did on Sunday. You can see my new equipment above. Now that I had a new camera to document my creations, I had to get into the kitchen immediately. Before I could bake, Elaine was willing to pose for an early Sunday morning snapshot. She hasn't had her coffee yet.

This is where the last blog picks up the action - as I mentioned, the first baking activity was the upside-down cake. I then ventured into the realm of bars. I have always been successful with my magic bars, but these required little skill in the way of constructing the crust. The crust is simply graham crackers smooshed with butter and pressed into the pan. The crust for caramel crumb bars and citrus squares required something a little more intensive. I was able to use my use my trusty food processor to grind down some blanched almonds into a nice light texture. This combined with some butter and flour to make the base for my caramel crumb bars, as well as the crumb topping the would be used later. Here in began my problems.

First and foremost, my trusty pastry cutter broke on me. Now, I was raised on the notion that this job can be done simply by using two butter knives. This was always my least favorite task whenever I helped Mom in the kitchen. I liked wet ingredients much better, and of course the wet ingredients always tasted better (that is where the sugar resides!). As I grew older and my baking skills matured, I came to regard the dry ingredients as highly as the wet, and thus invested in a small pastry cutter, only to have it break on me after hundreds of crusts and crisps. You will be missed, pastry cutter. RIP - In Memoriam

My next trip up was a baking mistake I promised myself I would never commit. Thinking I could use the oven for more than one tray at a time, I popped both trays of bar crusts into the oven at the same time. The upper crust was for the citrus squares, the lower for the caramel bars. I could smell the burning before I could help the situation. The crusts both looked OK, but the damage had been done to the caramel crust.

The next issue I confronted was the caramel itself. Every other caramel I have ever made included butter or sweetened condensed milk. This was just sugar, water, corn syrup, and some salt. I was suspect, but I did it. The pot to the right is the beginning stages of boil. It had not become amber at all. It took a little longer than Martha indicated in her book for the caramel to achieve any color at all, but when it did come to, it seemed to be the right texture. The taste was less than impressive. Perhaps I am used to a more butterscotchy/dulce de leche type of caramel. This was not what I have come to think of as ribbony-smooth delight.

Alas, I finished the caramel bars by pouring the caramel over the burnt crust and added formed balls of crust to the top of the bars. They baked and came out ok. The problem was, the next day, the burning taste of the crust, when combined with the brittle, hardness of the caramel, did not make for a delicious treat. I ate several, but then they were summarily disposed of.

But this post is not meant to be a baking bummer! In fact, the very title of this post is VICTORY! And victory sure is sweet. The best thing to come of this day was the citrus bars. These bad boys, which require 8, count them E-I-G-H-T, eggs, were the fluffy stuff dreams are made of. I took about a thousand pictures of these, hoping to somehow capture how well they came out. Visually, I did my best, but to really capture the essence of these yummy bars, one would have to eat them! Here are a couple shots of the process and the final product (dusted generously with powdered sugar).

Straight out of the oven...


Scrumptious slices of heaven!


Valentine's Day citrus square for Biscuit ..


This concluded the Sunday night baking. I had to get up eventually for school the next day, so I had to clean up the kitchen and get ready for the week ahead. The highlight was knowing that I would be back in the kitchen to bake again on Monday night in preparation for a birthday cake. More on that in my next post!

Wednesday, February 11, 2009

Oh, Martha... or The Weekend of Extravagance!

I must admit - I just spilled my homemade chai tea latte because I was so excited to be back on blogger. Literally, my internet has been a portal to many a website this week; however, it has been restricting my access to me beloved blog. So sad! And the thing about it is I have so much to share!

Martha Stewart once wrote "Baking offers comfort and joy and something tangible to taste and savor." Man, was she ever right on the money. I was never a huge Martha fan, nor did I get emotionally involved when she was convicted for whatever it was she did. I really only began to marvel at her talents when I developed an extreme fondness for baking. Some people are tremendous at cooking gourmet food; others at concocting creative culinary delights. Furthermore, others are skilled at hosting and homemaking. Martha is tremendous at all of these. I was thrilled to receive her Baking Handbook for Christmas. This past Sunday, I grabbed a cup of tea and read it nearly cover to cover, once again awestruck at the recipes and the pictures that accompanied the descriptions. I have several goodies cookbooks, and most of them do not have pictures. How can you tempt the taste buds if at first you don't excite the eyes? It's a mystery to me, so I gravitated to this Martha masterpiece.

In celebration of Valentine's Day, I decided to make Biscuit a romantic pineapple-mango upside down cake. Martha expertly crafted her pineapple slices to be cored and include a circular center of luscious mango. When I went to core my pineapple slices, instead of using a standard round cookie cutter, I used a heart-shaped cutter. The next part was slightly trickier; trying to slice a ripe mango into pieces that allowed me to cookie cut the corresponding heart shape.

Interestingly enough, the cutting turned out to be the EASIEST part. I confronted my next challenge by creaming together butter and brown sugar. I am pretty good at putting the paddle attachment on the mixer and performing this baking necessity. The challenge on Sunday, however, was that I had to then spread that mixture evenly over the bottom of an 8x8 pan. This part literally took me 20 minutes. To evenly spread creamed butter and brown sugar seems like a simple task when equipped with a little offset spatula. It still took me forever to get this critical part right.

The rest of the process was quite fun! I placed the remaining pineapple and mango in a sieve to drain the juice. I whipped up a light and fluffy cake batter, then I layered the pan: creamed butter mixture on the bottom, aforementioned pineapple/mango cutouts, the remaining fruit, and the cake batter. I popped it in the oven for 50 minutes (no cake in Martha's book take less than fifty minutes to bake, so have a good chunk of time set aside for yourself. Here were the results: Below left - baking in the over. Below right - resting on the cooling rack.


Below center - finished product

Here is a shot of Biscuit enjoying the cake

and some of the slices.

I am quite proud of my first ever upside down cake. I continued to bake nearly all day Sunday. So much so that I had to buy Biscuit some new Wii games so that he would be entertained as I was occupied in the kitchen all day. I made citrus bars with a great deal of success and I tried a caramel crumb bar concoction that just didn't measure up. But just like with baking, certain things have to be done in batches. Such is the case with my blogging today. I will be back ... more than likely later today, to finish raving about my excursion into bar baking, then more on the Peppermint Devil's Food layer cake creation and the cheesecake thumbprints that I made in the last two nights. And, of course I will be telling you about my foray into candy creation when I made my mini marzipan mice. All this and more in the next edition! Stay tuned!

Tuesday, February 3, 2009

No bake = NO GOOD, and other weekend catastrophes

So, I have a wedding coming up. Currently, Biscuit and I are "Fighting the Fat," a local weight loss competition that, initially, I was bound and determined to win. Oh right, then I remembered that I LOVED to bake.
My Mom has this uncanny ability that Kerri and I do not seem to possess. She can cook and bake up a storm and not eat a bite of it. I mean, not even the cookie batter (which to me is often better than the actual cookie!). So silly Dayna decides to search the interweb to find some healthful baking. Good luck with that, Mongelli...
And so I landed on Allrecipes.com, a personal favorite site of mine. Biscuit and I shirked the traditional American pasttime of watching the Superbowl, and instead joined in Roger Federer's dismay as he lost to butt clown (Biscuit's own term...slightly censored) Rafael Nadal. Since we were both upset, I baked.


Or did I bake? I guess I technically didn't. Using the Allrecipes advanced search, I looked for cookies that contained cocoa and shortening, two ingredients which I had in abundance after the holidays. I found a recipe that sounded quite good - chocolate coconut macaroons, however, they were no-bake. Everything was to be done on the stove top. I would give you the recipe if I didn't bake these first.


I melted down the shortening with some cocoa, coconut, and sugar. I brought it to a boil and added the oats. Once I allowed the mixture to cool slightly, I began rolling into balls. No sooner did I dive into the batter did I realize how dry the cookie mounds looked as they awaited the fridge. I tried to reshape that balls into flat cookies, realizing that the mounds were not going to bake down at all (hence the no-bake thing), and these puppies just crumbled before my eyes.


I added some good old H2O to the mixture and was able to shape the remainder of the batter into cookies, which Biscuit proceeded to consume. I did not take this as a compliment - it was the first real sugar he was eating in weeks! After sugar substitutes being used in everything from his coffee and tea to his ice cream, I think the real stuff was like a drug, attracting him to eat these dry cocoa ball creations. I was none too pleased with these results.
A second, slightly more successful attempt were the caramel oatmeal pudding cookies I tried. Once again I splurged on real sugar and combined it with butter, some dried buttermilk mixture, oats, and butterscotch pudding, making these REALLY butterscotch oatmeal cookies, but I digress... The recipe called for 2.5 cups of oats. I kept adding, and adding, and ADDING oats. I literally must have used 5 cups until the darn things could solidify into cookies. I made about 4 normal shaped cookies, and noticed I was getting baker's fatigue (more like FRUSTRATION). I decided to spread the mixture into a greased 13x9 glass tray, and chilled them overnight. The result were 30 delicious oat bars that Biscuit and his colleagues consumed nearly instanteously.
(the terrible pudding cookies, part II)

Wanting to try for a healthified version of these bars, I attempted them again tonight with some sugar substitute instead of the real stuff. These things didn't solidify worth a darn. I guess the real stuff is totally worth using if you are going to bake. I suppose I will just have to learn my Mom's virtue of self-control, something I clearly do not possess around goodies.
In addition to this major mistake, I tried to make cocoa applesauce cookies, once again, for the sole reason because I had all the ingredients this recipe required. This does not make for a good recipe. The batter tasted like NOTHING - I think this was the result of using sugar substitute (as the recipe calls for) and shortening. I will never, ever use shortening for anything other than pie crust and chocolate chip cookies. So, in a vain attempt to solve the issue of "no taste" I added toffee bits. I had these deep in the recesses of my freezer. Knowing they were there and being on a diet did not bode well for me, so I figured I would use them. These bits did nothing to enhance the taste nor the appearance of the cookie, save to give the cookie a bonbon look to the outside. Too bad it didn't taste as nicely.


Only after I took pictures with my very bleary camera (sad news; the elph camera which has brought you so many snaps of baked goods is slowly but surely dying) did I realize both the nasty macaroons and their cousin the applesauce cocoa cookie look very similar. Alas, here they are:
The No-Bake Disaster
The psuedo bonbons
I have learned a lesson: I will stick with baking (no more no-baking) and I will stick with sugar! Lesson LEARNED!